Quick Guide
Track your income, expenses, savings, and goals — all in one clean and visual interface. Here’s how to use the Financial Tracker, step by step.
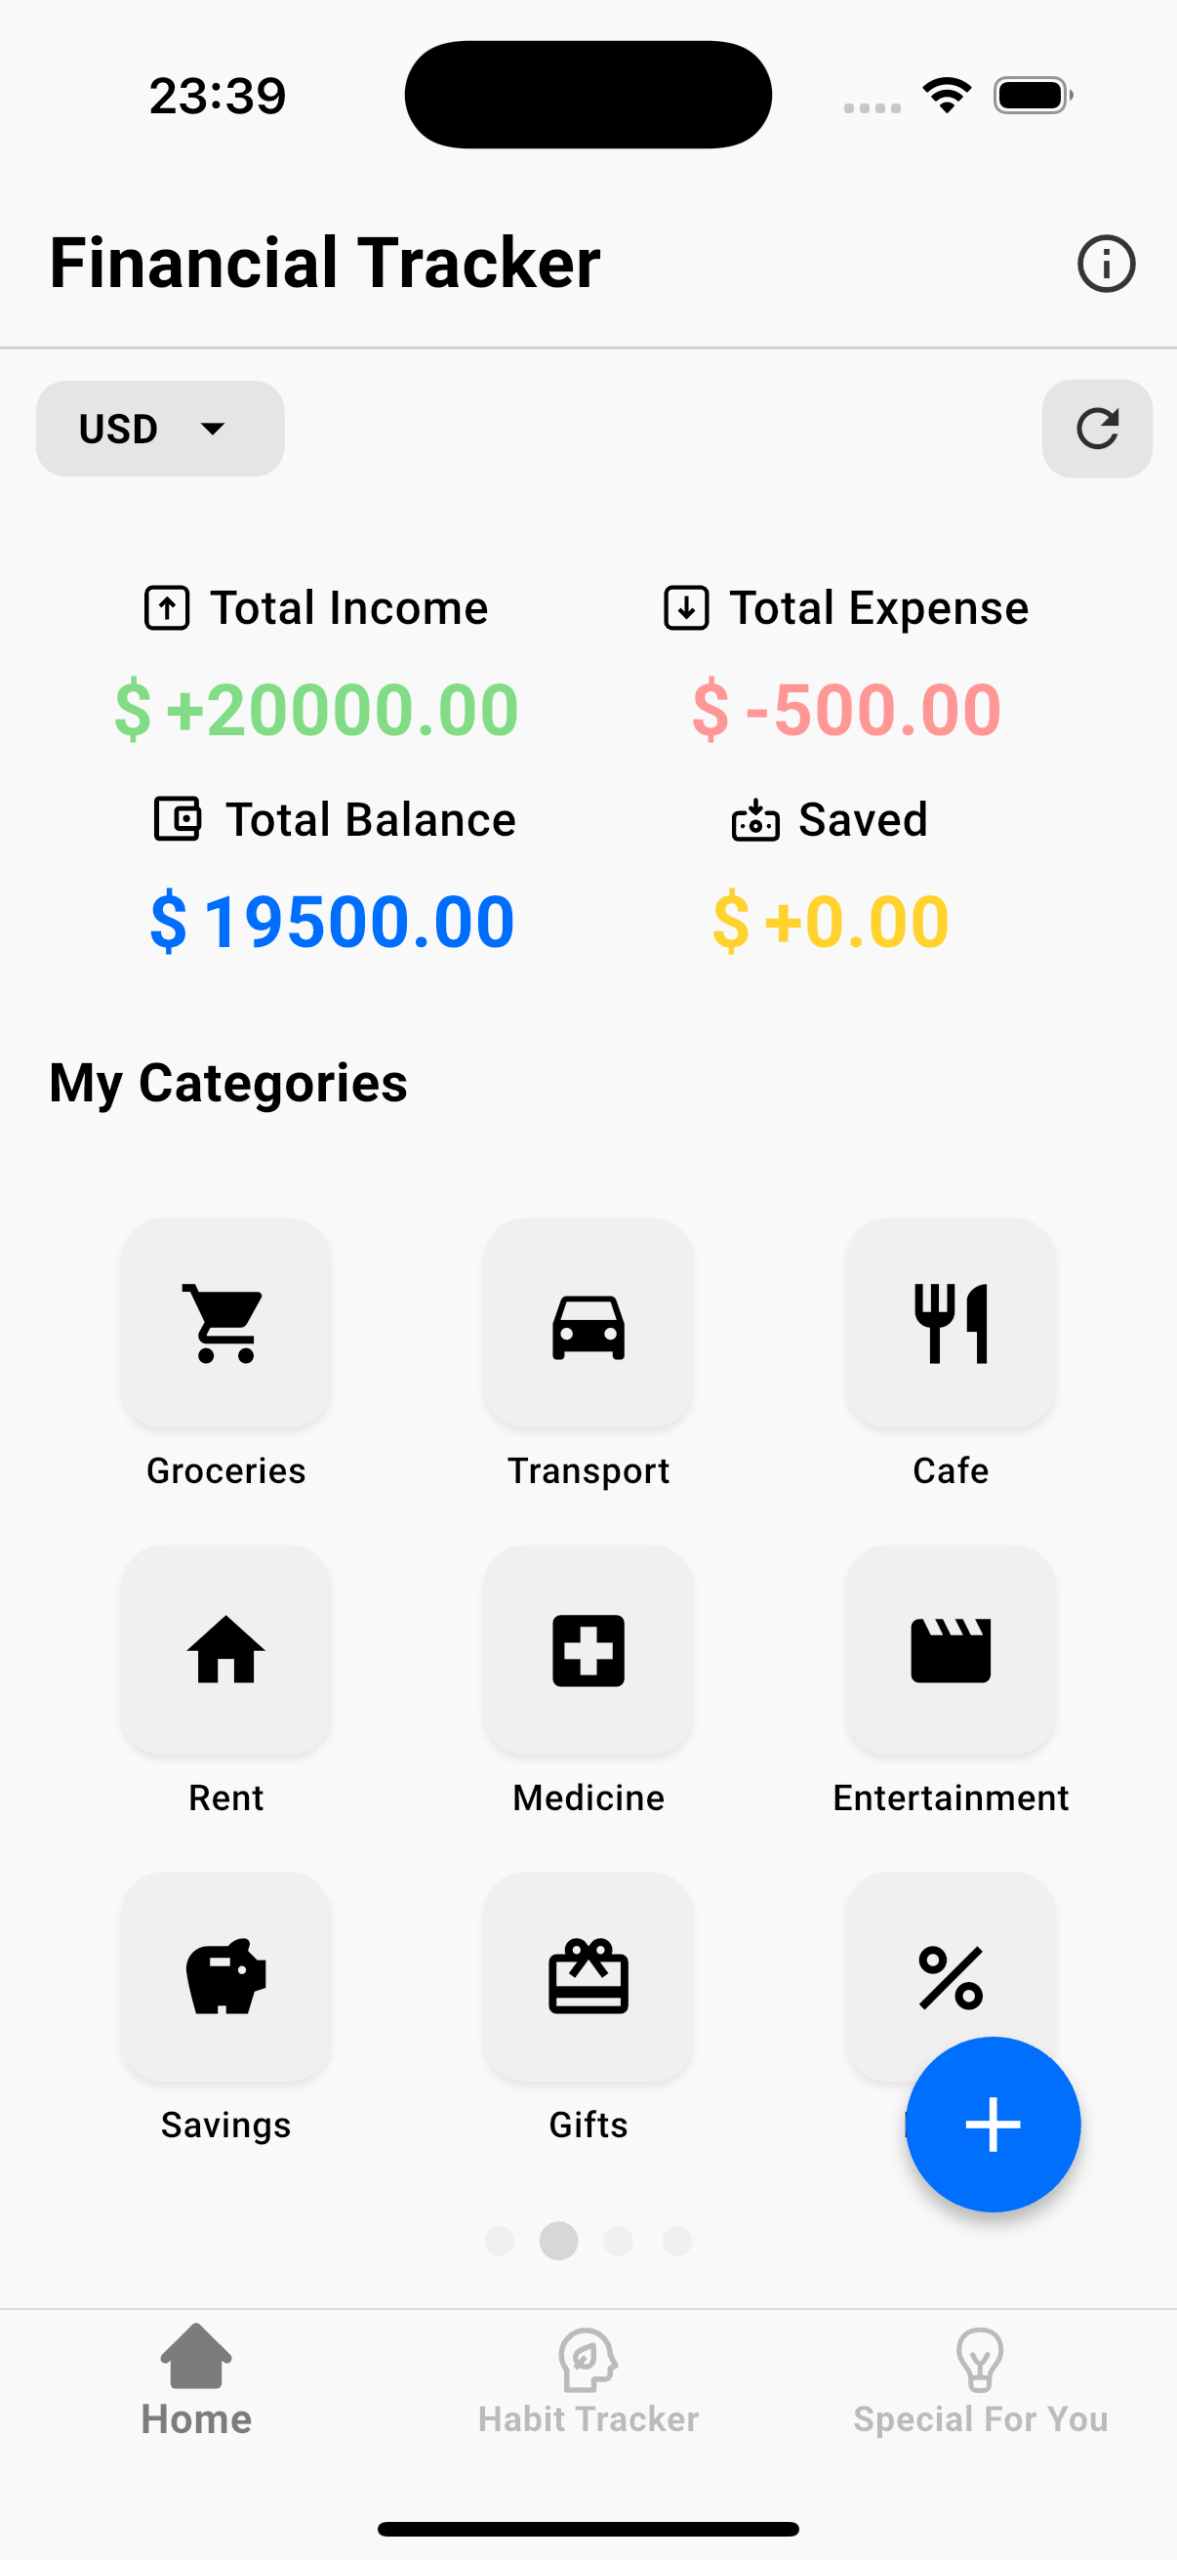
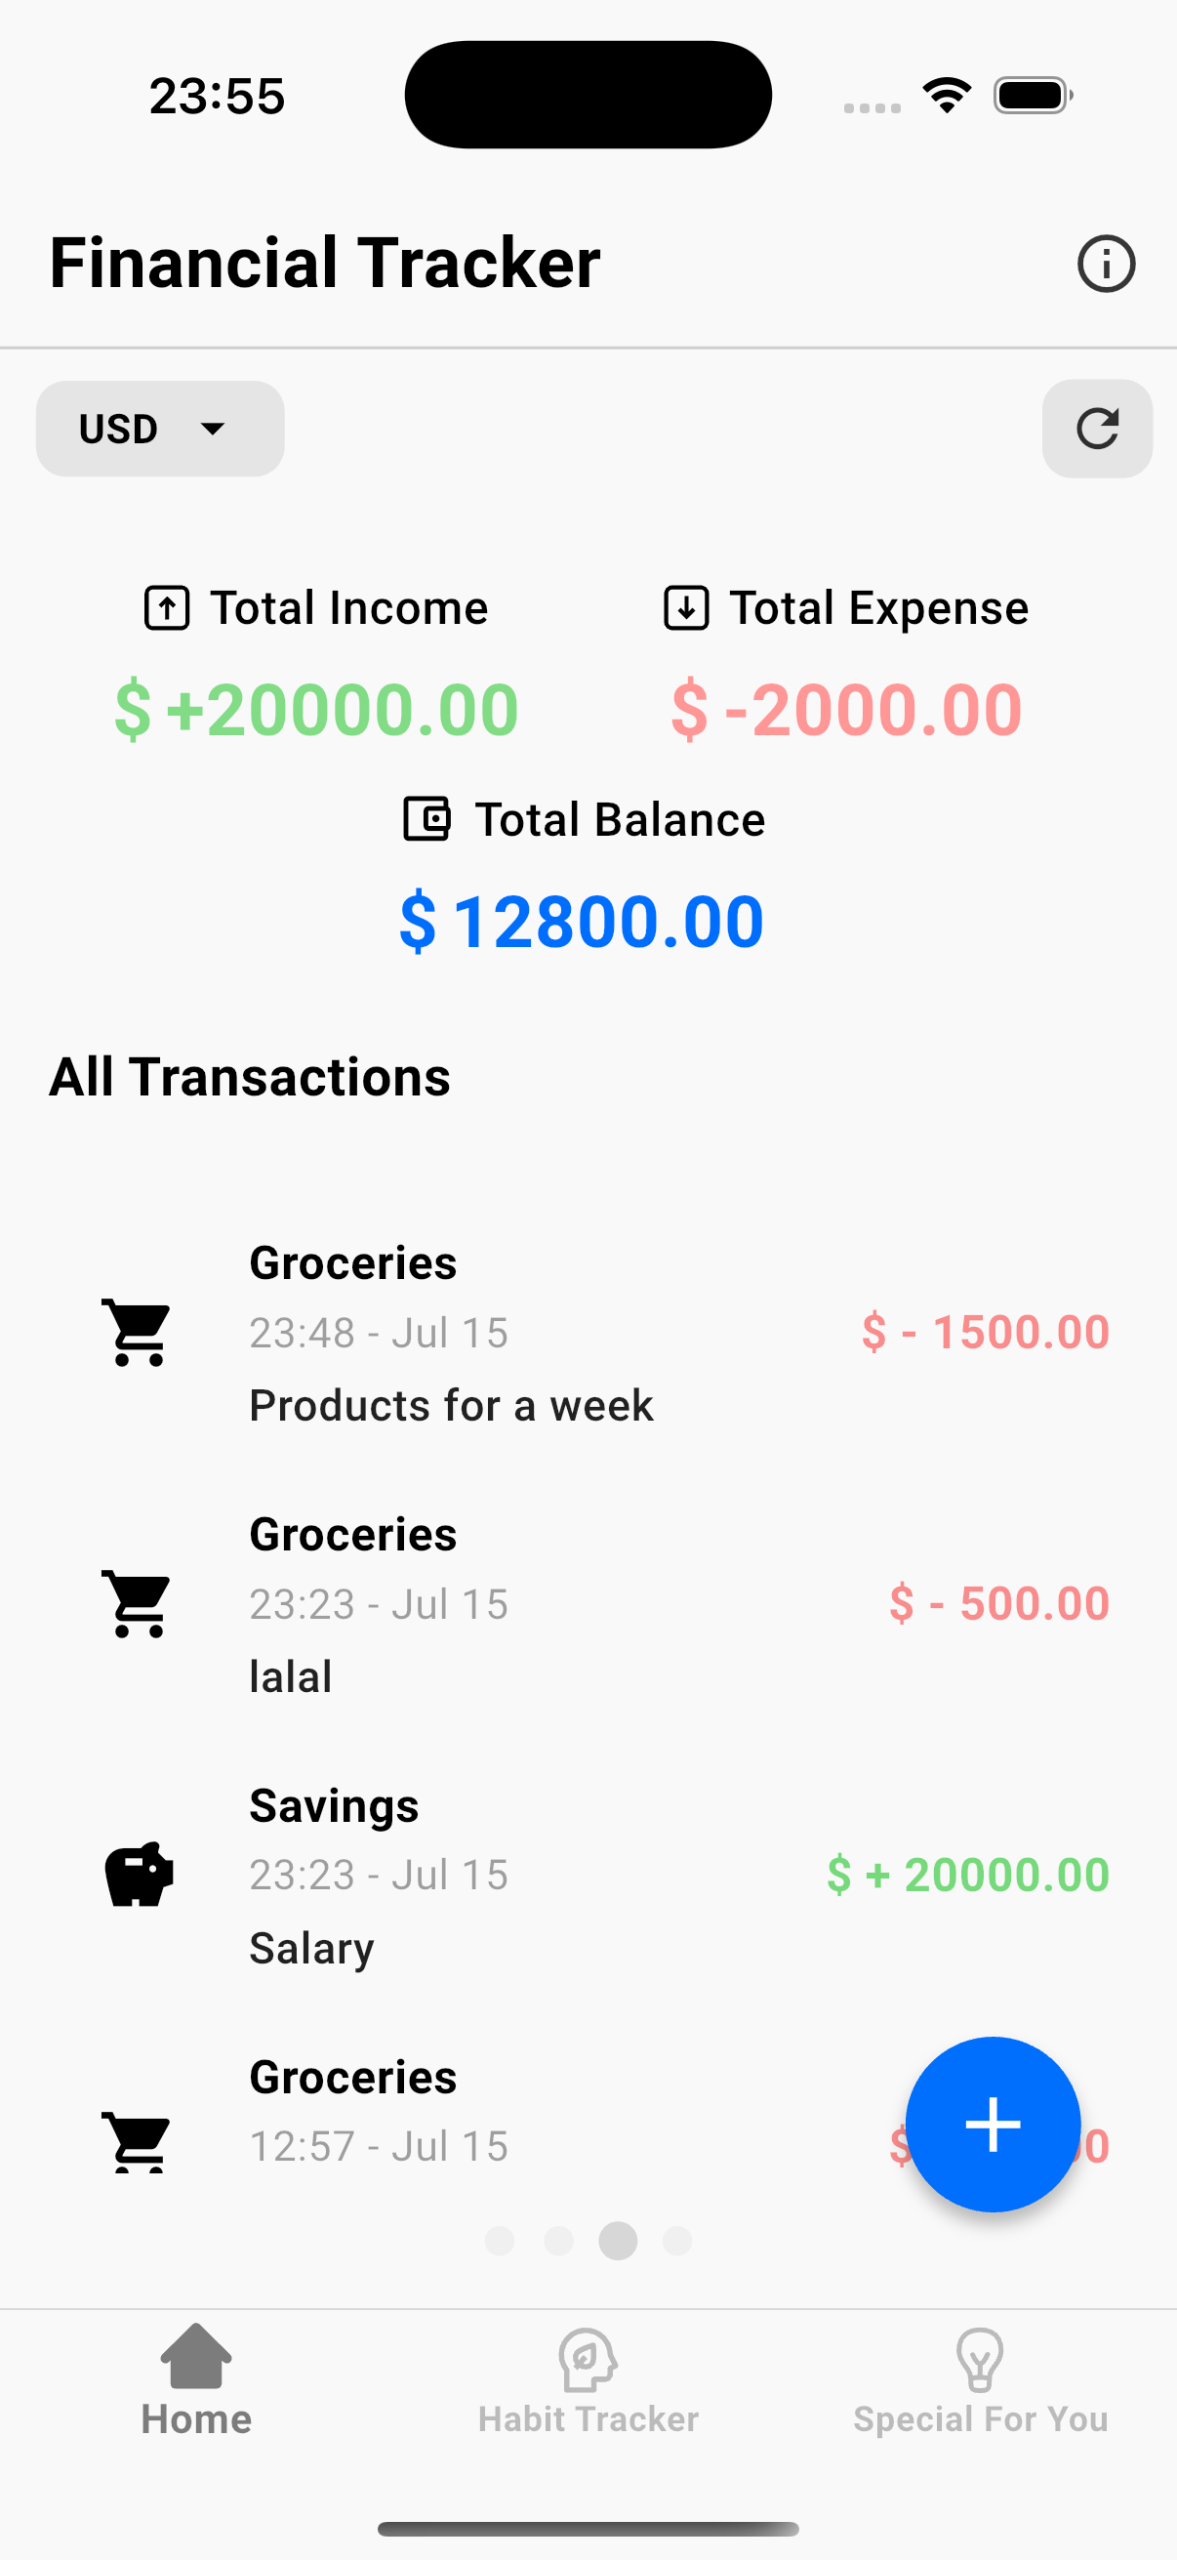
📊 Dashboard Overview
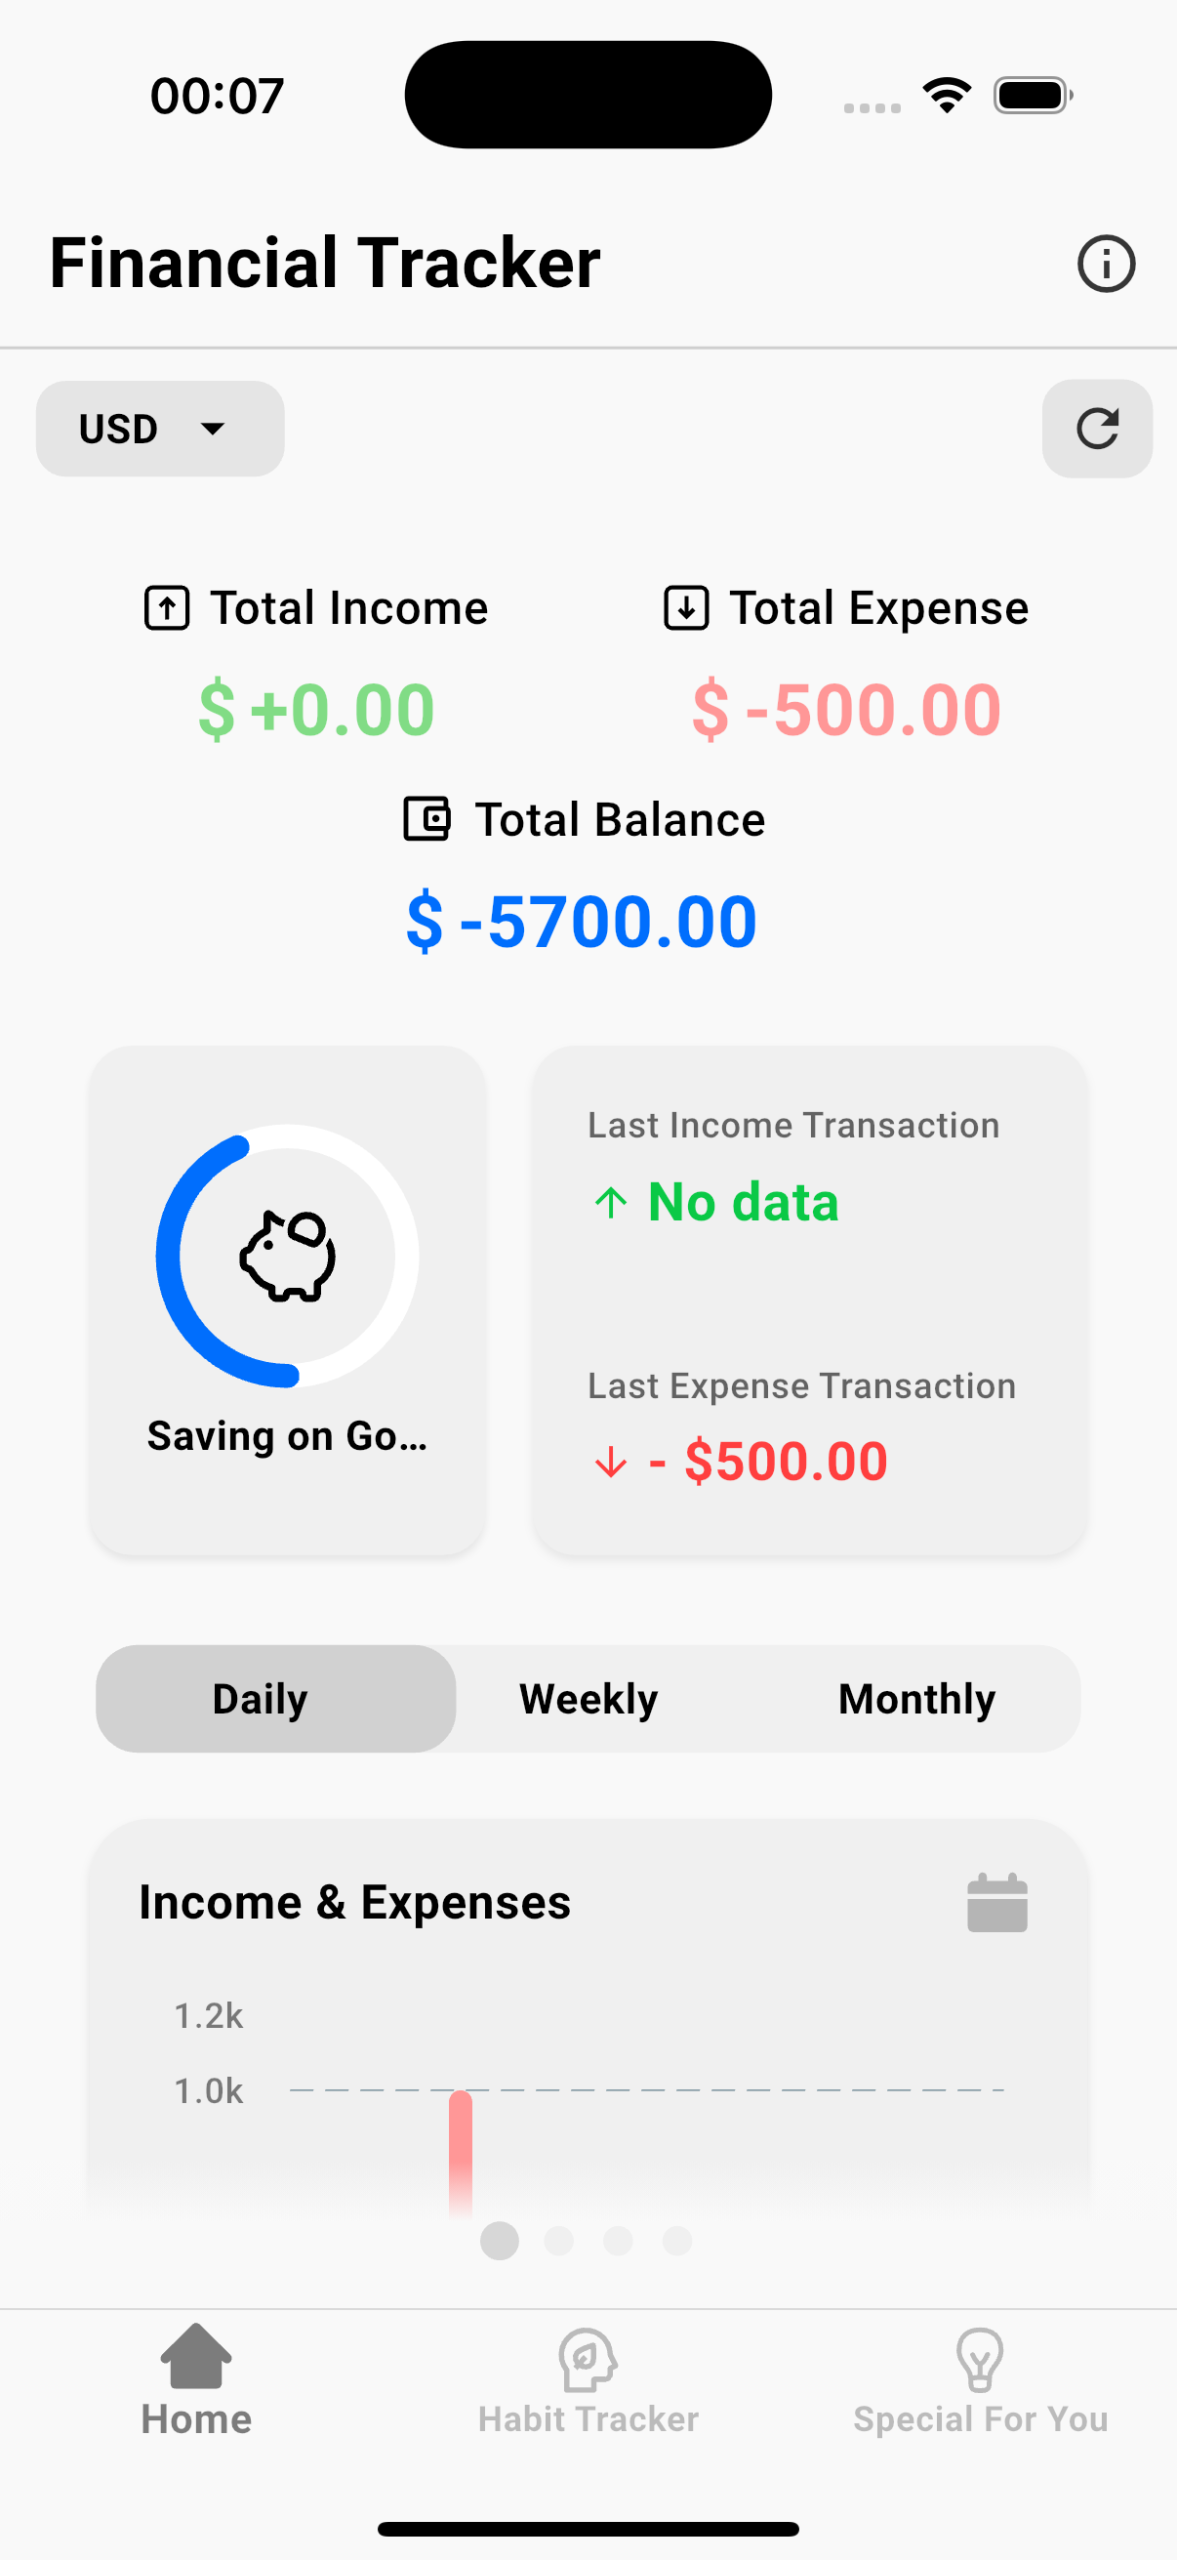
The dashboard gives you a quick summary of your current financial status:
-
💰 Total Income
-
📉 Total Expense
-
💼 Total Balance (available budget)
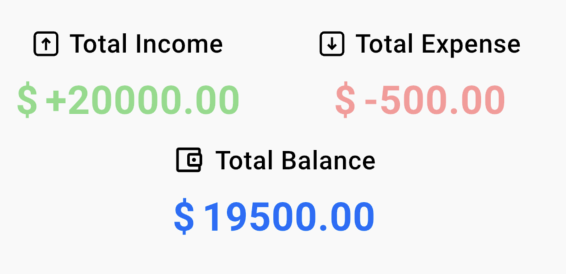
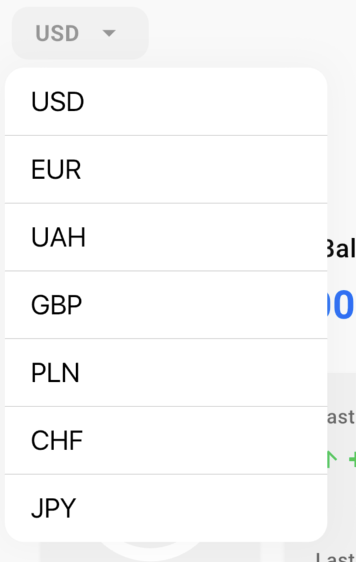
- You can select your preferred currency using the dropdown in the top app bar — all values will update instantly based on current conversion.
🔄 Clear Balances

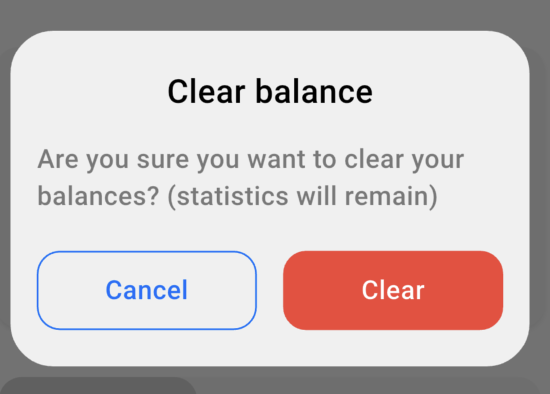
To help you start fresh each month, Purrfect Plan allows you to reset your financial dashboard while keeping your transaction history intact.
When you tap the arrow icon in the app bar and choose “Clear Balances“:
- Total Income, Total Expense, Total Balance, and Saved amounts will reset to zero
- Your past transactions, deposits, and statistics are NOT deleted
- You can continue tracking your budget from a fresh start
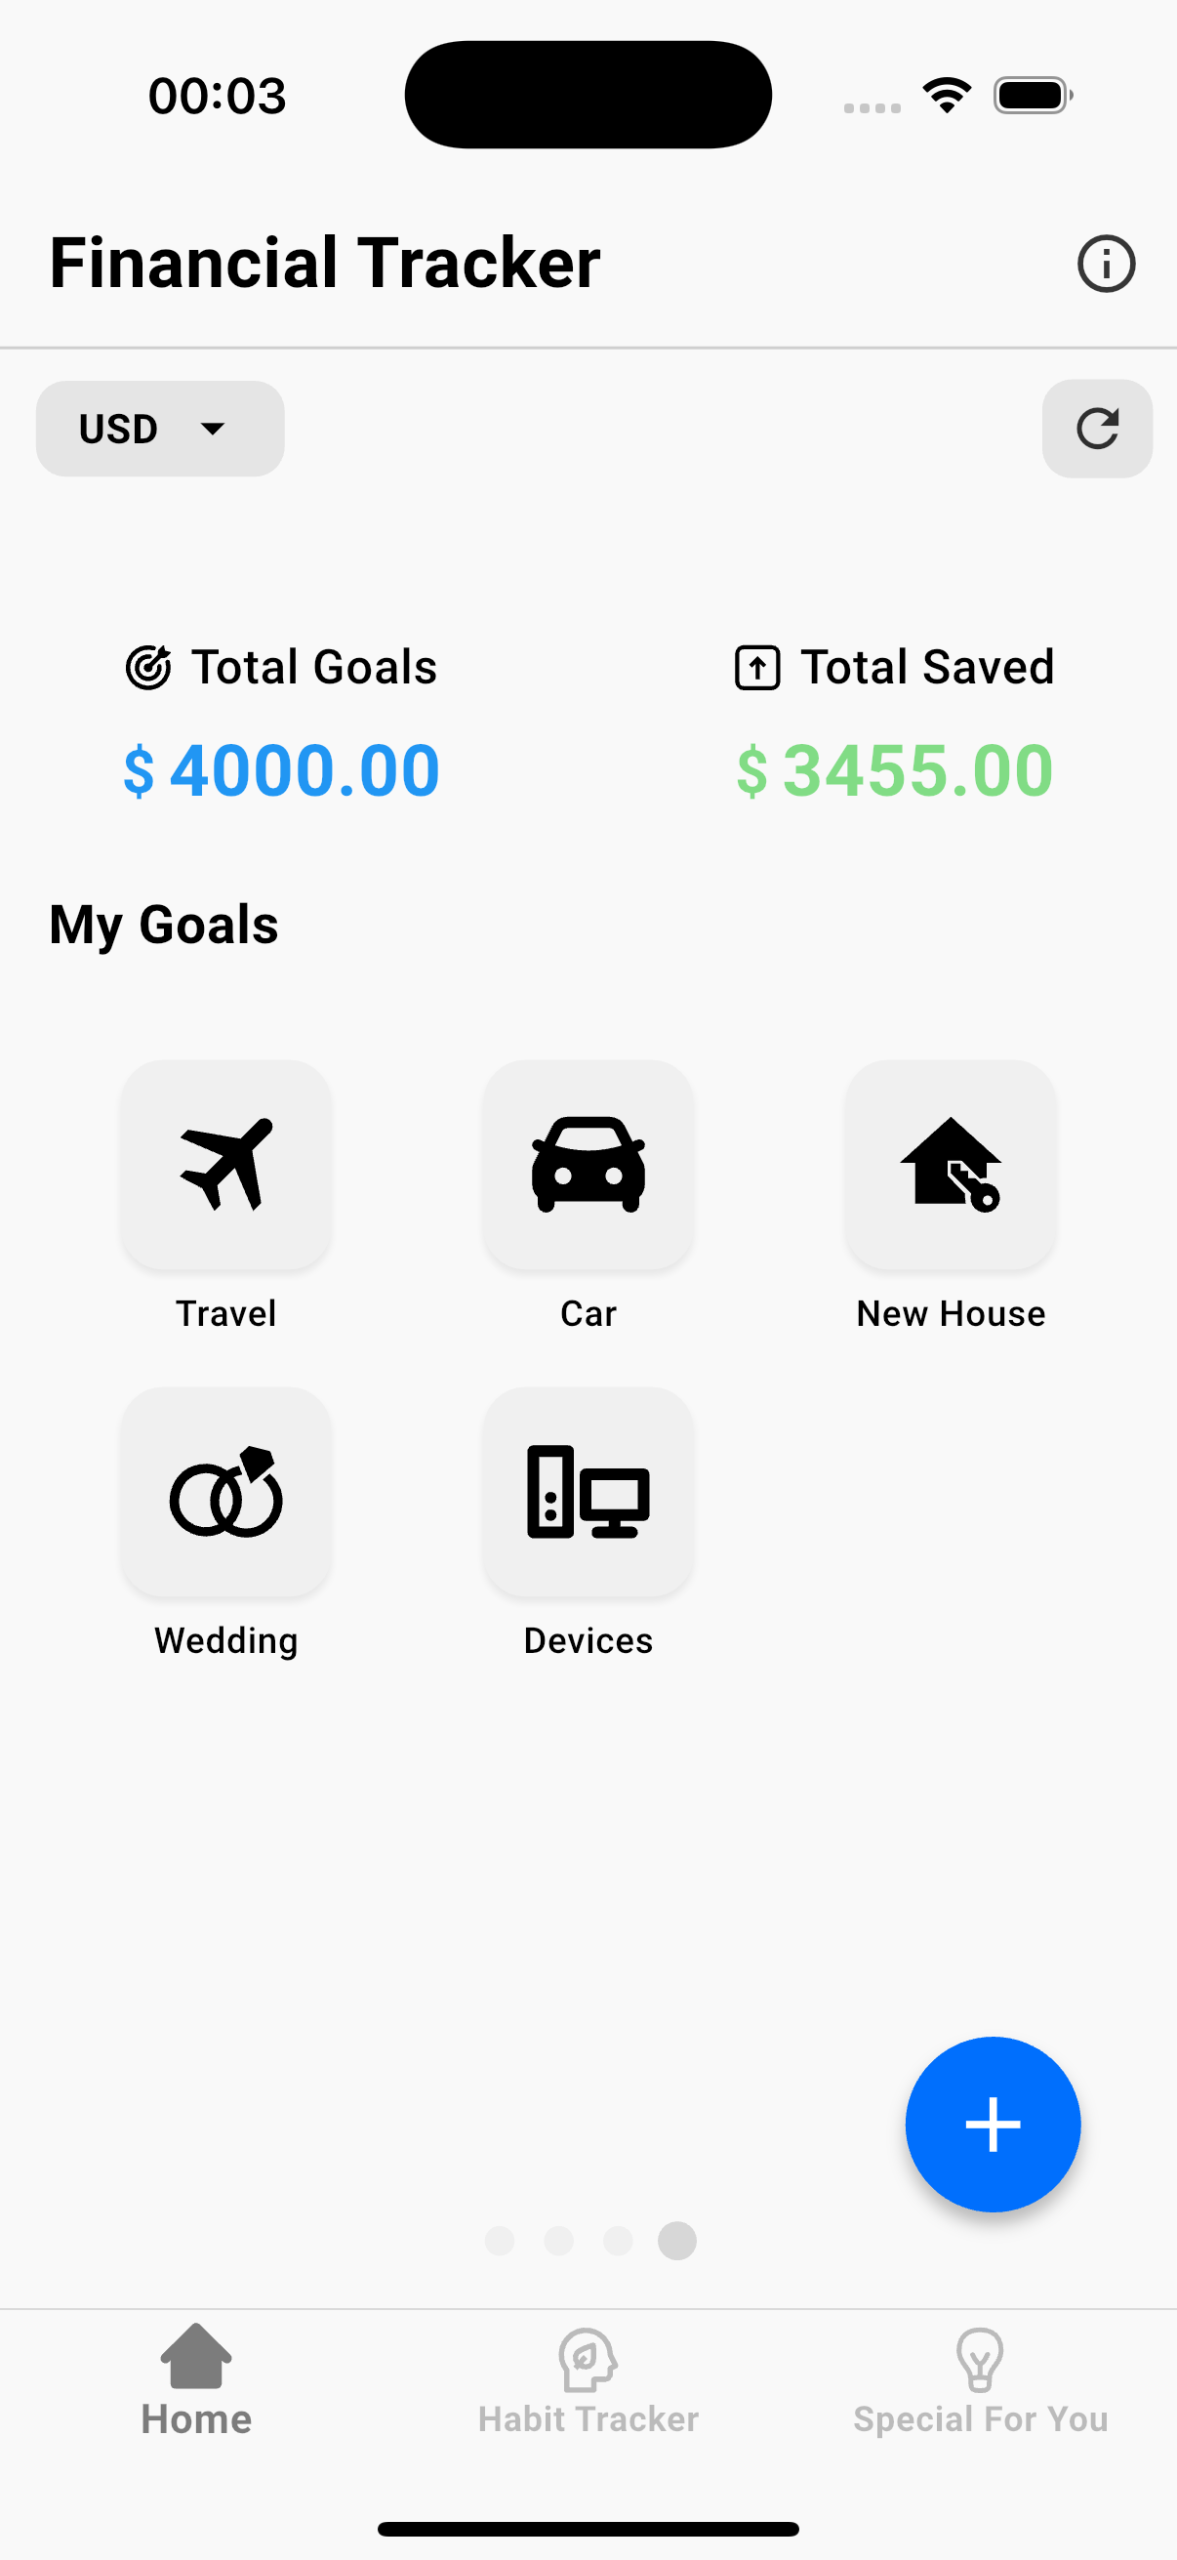
Quick Access Cards
-
🎯 “Savings & Goals” – opens your savings screen
-
💳 “Last Income/Expense” – opens screen with all your Transactions
-
📊 “Statistics” – opens financial charts and reports
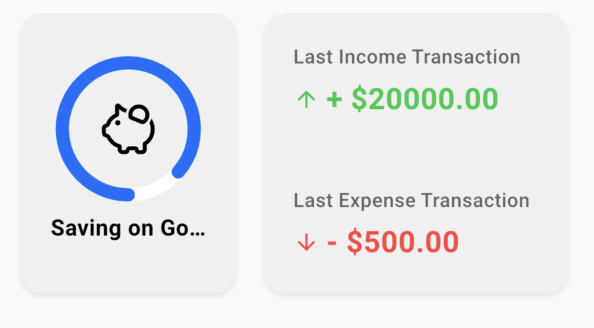
These cards let you jump directly into details, without navigating through menus.
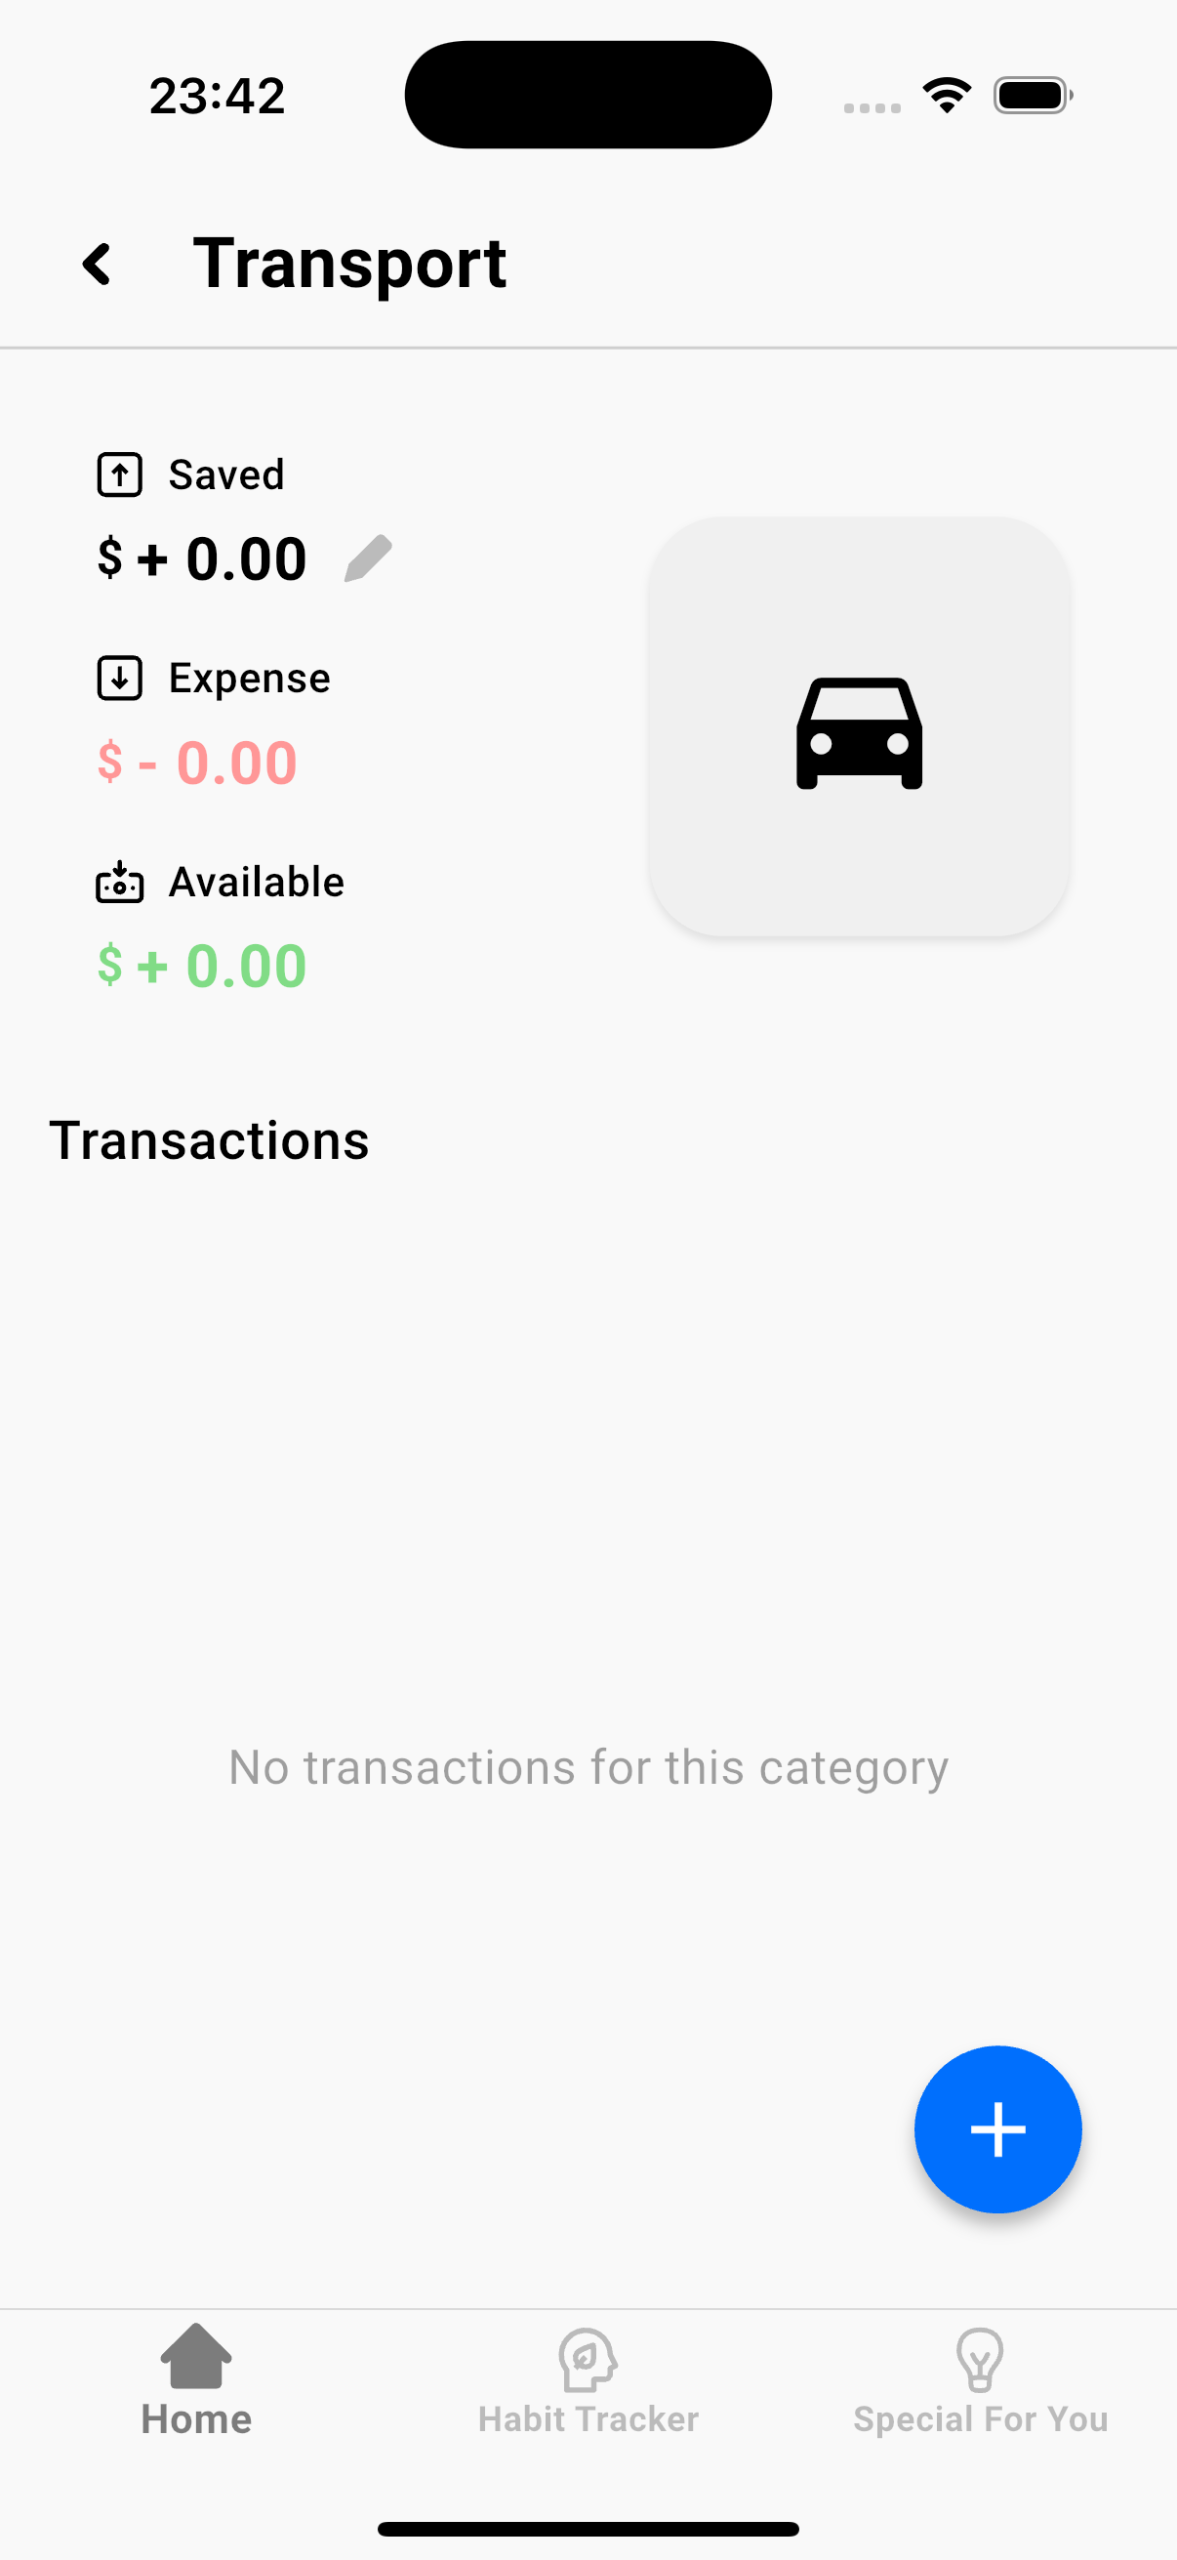
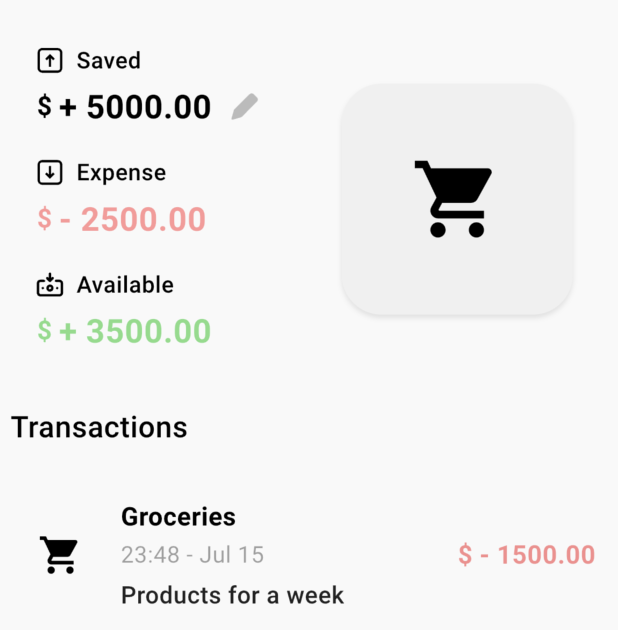
🗂️ Budget Categories
Categories help you organize your income and expenses. You can split your budget across areas like Groceries, Transport, Medicine, or any custom category.
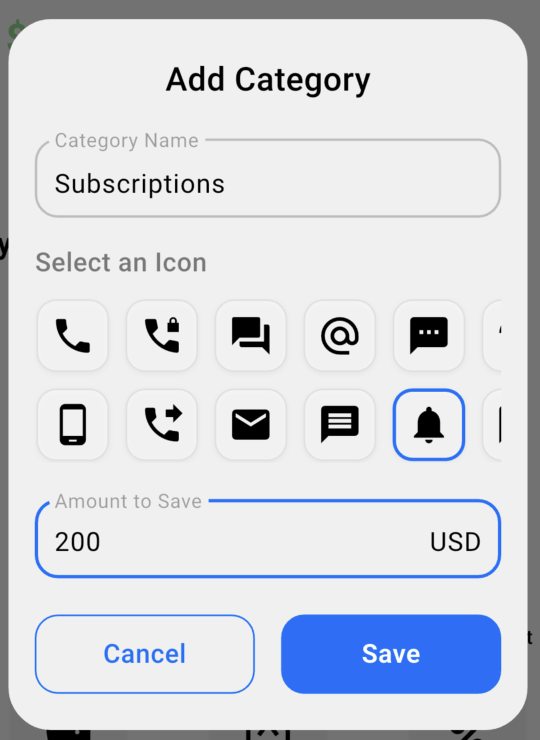
➕ Creating a Category
- Tap the “+” button on the Categories screen
- Enter a category name
- Choose an icon
- Tap “Create”
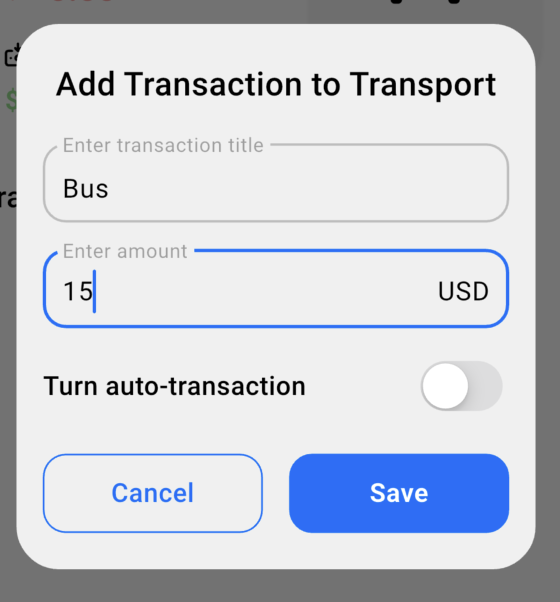
💸 Adding Transactions Inside Categories
Tap on any category to view its details. You can add transactions directly from the category screen — they’ll be automatically linked.
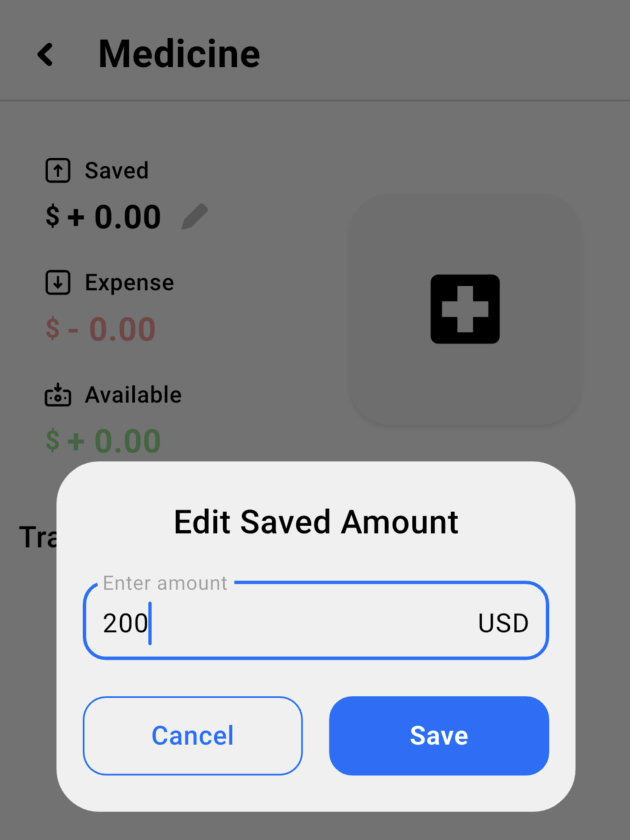
💾 Monthly Saved Amount
Each category allows you to set a “Saved Amount” — a part of your budget reserved for that category during the current month.
Example: You want to save $200 for “Medicine” this month. Enter that amount into the “Saved” field of the category.
♻️ Rollover Option: “Add it to the new amount”
✅ Enabled → Unused funds from last month are added to the new saved amount
❌ Disabled → Only the new amount is saved; leftovers are ignored
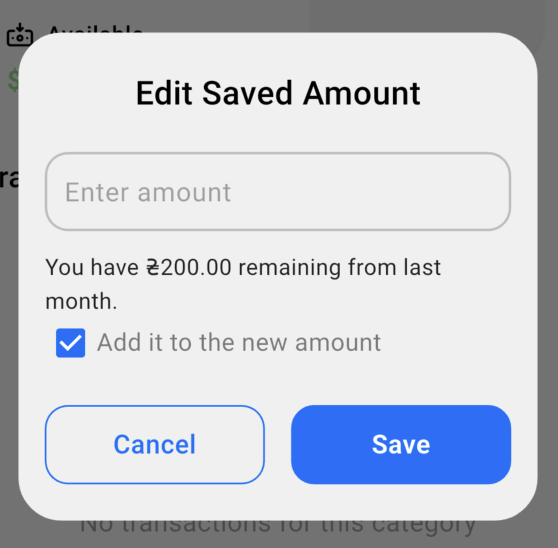
This helps you manage leftover funds and keep control over monthly spending plans.
📈 Category-Level Budget Summary
Each category displays:
- Income and expenses for that category
- The amount saved
- Remaining available funds
💳 Transactions
The Transactions screen shows all your income and expense entries. You can easily add, edit, and review transactions — all linked to their respective categories.
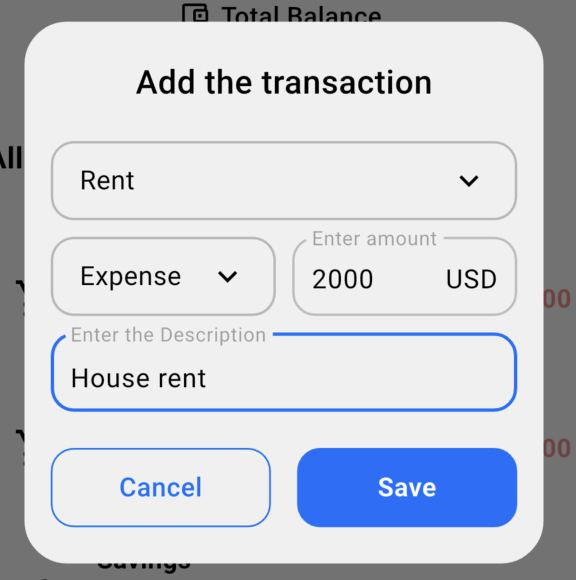
➕ Adding a New Transaction
- Tap the blue “+” button
- Choose a category
- Select type: Income or Expense
- Enter the amount
- Add a short description (optional)
- Tap “Save”
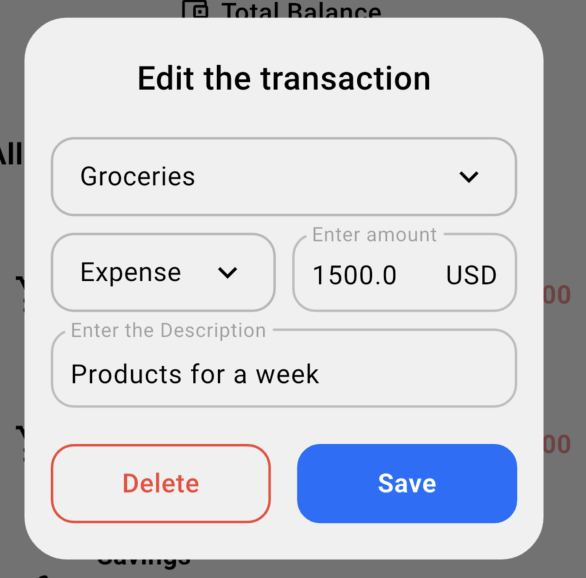
✏️ Editing or Deleting Transactions
Tap on a transaction to:
- Edit details
- Delete it permanently
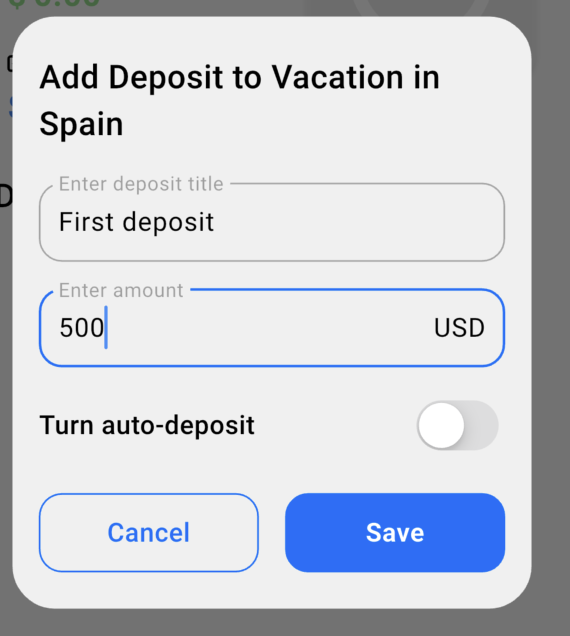
🎯 Savings Goals
Goals are designed to help you save money for long-term purposes like travel, a new phone, or a car — completely separate from your monthly category budget.
➕ Creating a New Goal
- Tap the “+” button in the Goals screen
- Enter a goal name (e.g. “Vacation in Spain”)
- Choose an icon
- Set a target amount
- Tap “Save”

💵 Adding Deposits
Inside each goal, you can manually add deposits — this is money you’ve set aside for that goal.
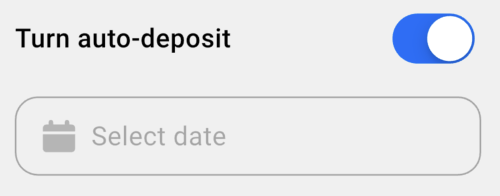
⚙️ Auto-Deposit (Optional)
When adding a deposit, you can enable the Auto-Deposit toggle. This will automatically add that amount to your goal on a selected date.
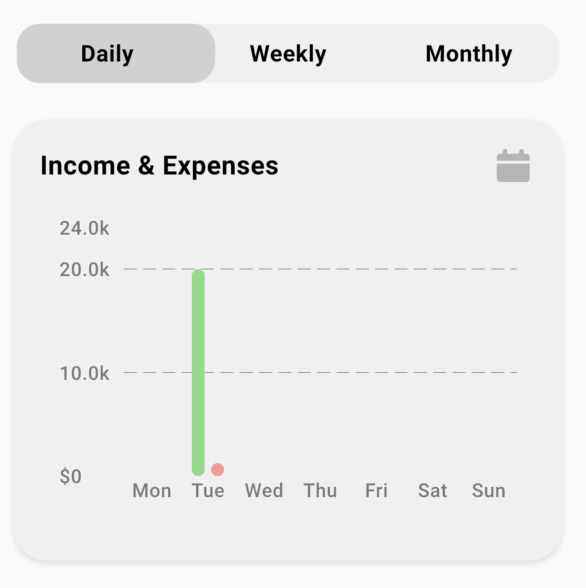
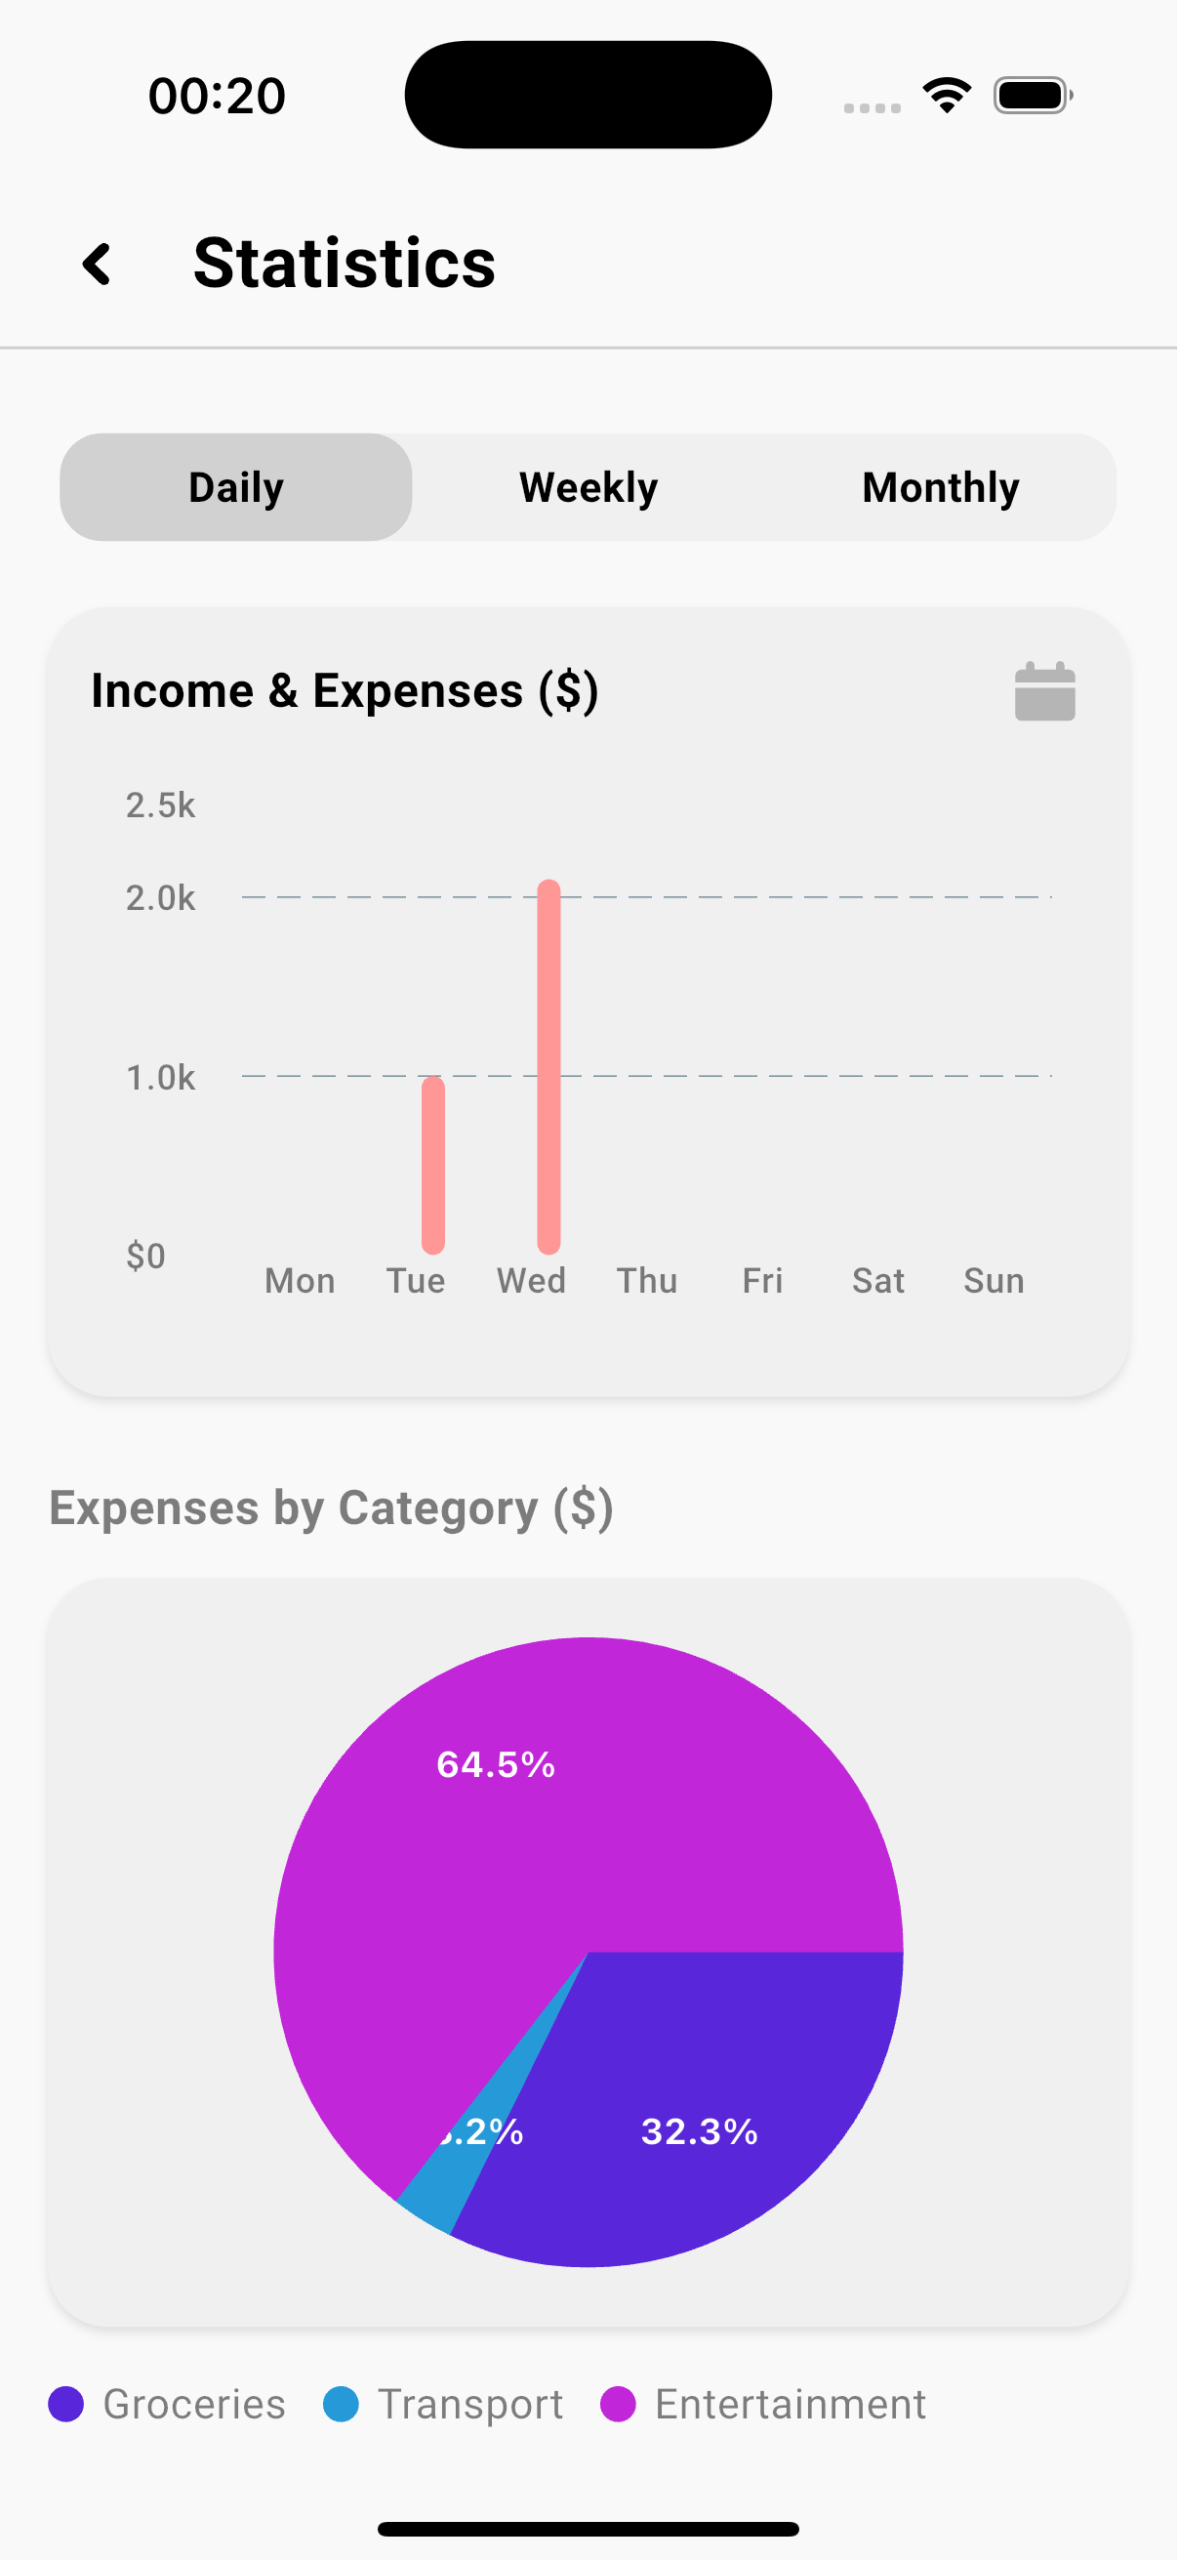
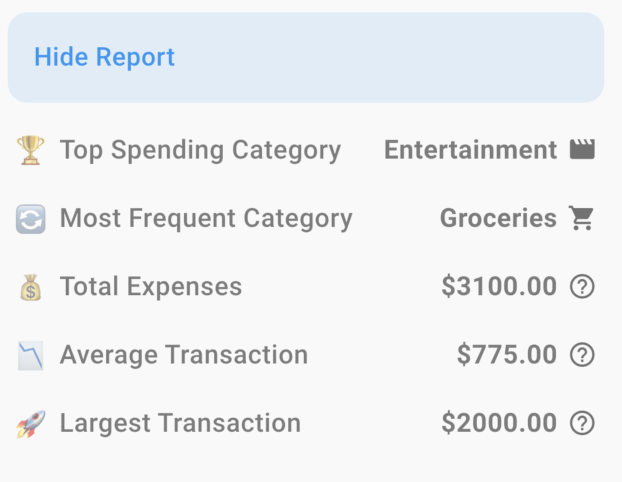
📊 Statistics & Reports
The Statistics screen gives you a visual overview of your income and expenses. It helps you analyze your spending habits and track financial progress over time.
📋 What You’ll See
- Daily/Weekly/Monthly bar charts for Income and Expenses
- Pie charts for category-wise distribution
- Key statistics:
– 🏆 Top Spending Category
– 🔁 Most Frequent Category
– 💸 Total Expenses
– 📊 Average Transaction
– 💰 Largest Transaction
📥 Export Reports
Tap the download icon to export your transactions as a CSV file. This file includes:
- Date
- Category
- Description
- Amount
- Type (Income or Expense)
You can use this report for financial reviews, taxes, or backup.